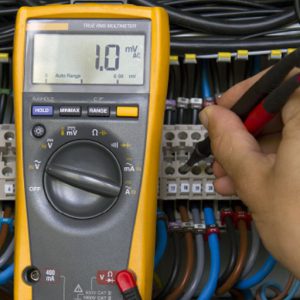
When was the last time you had your measuring instruments tested and calibrated? If you can’t remember, then it’s time to find out when they were last serviced. You may even be thinking that it’s not necessary and that your equipment is perfectly ok to use. But this is definitely not the case. In this article we are going to look at calibration and why it is so important.
What is calibration?
Calibration is when you compare a known measurement (the standard) and the measurement of the instrument in question. Usually the accuracy of the standard is ten times the accuracy of the tested measuring device. However, an accuracy ratio of 3:1 is acceptable by most standards organisations.
Why is calibration important?
If you are taking measurements, then you need to make sure that they are going to be as accurate as possible. The calibration of your measuring instruments will confirm:
• the accuracy of the instrument
• determine the traceability of the measurement.
However, any degradation to any measuring instruments will affect any readings. One of the main reasons that causes any degradation is general wear and tear. But electrical or mechanical shock or the manufacturing environment are common causes too, along with a combination of instrument type and environment. Hazardous environments (such as oil, metal chips etc) in particular are known to increase the rate of the degradation. The bottom line is that regular calibration improves the accuracy of the measuring device. Moreover, if you have accurate measuring instruments your product quality remain at a high standard.
When should you calibrate your measuring instruments?
Most of us check our car tyre pressure regularly. Why? To make sure that you have the best possible control of your vehicle and of course to get a higher fuel efficiency! If you use measuring instruments regularly then like your car tyres you also need to re-calibrate them, to get the best out of them. Determining when you should calibrate your measuring instruments however isn’t always as clear cut as it would seem.
Here are 6 factors to consider when scheduling in your calibrations:
 Always follow the recommended calibration interval
If you take measurements that vary from project to project you will need to follow the recommendations of the manufacturer.
Timings (weekly, monthly, bi-annual or annual)
When your measuring instruments need calibrating will vary and getting the timing right is dependent on a number of conditions. Firstly, the usage, those with higher usages will require more frequent calibration. Secondly, the cost factors, more frequent calibrations means machinery could potentially be out of action which could affect profit. Finally, the type of measurements, if you are carrying out a mix of non-critical and critical measurements then an annual calibration will be sufficient. However, if there are more critical measurements than non-critical then opt for bi-annual calibrations.
Starting a new project?
Any new project needs planning. If you have a project that requires highly accurate readings, then you need to consider what measuring instruments you need and arrange the calibration of them. If you don’t want instruments used before the testing to minimise the risk of errors during the project, place them in lock down.
Know your project requirements
Every measurement project has different levels of calibration and assurance depending on the type of instrument and their size. Of course, while some may need calibrating and certifying, others may not.
At the end of a project
Whether your project requires highly accurate readings, you should calibrate instruments before and after a test. This will confirm the accuracy of the results.
Don’t let disruptions disrupt you
An incident such as a power outage or a mechanical or electrical shock during any project, could potentially affect the accuracy of any readings. Industry recommendations advise that measuring instruments should be re-calibrated regardless of what stage of the project or testing.
The Risks
As previously stated, you may not think it necessary to calibrate your measuring instruments and that it is perfectly ok to continue to use them. But the hidden costs and risks associated with an un-calibrated measuring instrument could be much higher than the cost of calibration.
Here are 5 risks if don’t calibrate:
Compliance and safety issues
This is really a no brainer, no one wants an accident to happen. By not checking measuring instruments regularly you increase the risk of accidents.
Wastage of resources and raw material
If you are doing precision work, then you want to be getting the most out of raw materials and keep resource wastage to a minimum. If not, there is not only the impact on your profit margin but also on the environment to consider.
Low quality final products
Your measuring instruments need to remain in good condition otherwise they will start to produce inferior products. This could have a negative impact on the company reputation and profits.
Increased downtime
This is something no business wants – if you are not producing your product then you are not making money.
Legal claims
Not looking after your measuring instruments could cause an accident, which could then lead to a legal claim and a tarnished reputation.
Here to calibrate
We recommend that you get any measuring instruments calibrated regularly by a reputable company. With over 40 years’ experience in hiring and calibrating test equipment we have plenty of know-how. We adhere to the industry’s standards and all our laboratory test equipment is checked annually by UKAS accredited laboratories.
If you have measuring instruments that need calibrating or repairing contact Kath or Roy on 01928 589600.
Did you know that we give customers the option to purchase instruments? Why not take a look at what we have on offer? If you’re not in a position to buy then why not hire? We have an extensive range that we update regularly with popular brands and the latest models.

